![]()
![]()
![]()
![]()
![]()
![]()
![]()
![]()
![]()
![]()
![]()
![]()
![]()
![]()
![]()
![]()
![]()
![]()
There are a number of different kinds of model rail track to choose from. The main choices are :-
Set track or Flex track? The traditional train set comes with a circle or oval of track. This consists of 'set' pieces of straight and curved sections that are assembled to make the required shape. Usually there are 12 sections to make a circle, sometimes 8 or 10, depending on the manufacturer. The advantage of this kind of track is that it can be quickly set up on the table (or floor - although this is not recommended in most cases) and quickly pulled apart and packed away later. The disadvantages are that the pieces get loose with repeated assembly and disassembly. Also you are 'stuck' with certain formations based on the fixed geometry of the track.
Flexible track, as its name implies, can be bent to any shape you want. The track is usually sold in 1 yard (914mm) lengths and may be laid curved or straight or any combination you wish. This means that the track must be nailed down to a board and also needs the rails trimmed to length as you bend the track. Curves can start gently and become increasingly tighter as on the prototype so that your trains don't lurch into a tight curve like a roller coaster.
It does not matter what kind of track you use. You can even use both kinds together. What you use may depend on your preferences. Flexible track is more work to set up, but the extra time and effort rewards you with less joins, more realistic looking curves and often a cash saving as flex track is usually cheaper than the equivalent length of set track.
![]()
Steel, brass or nickel-silver rails. Model rails are usually made from one of these materials. The track found in many train sets has steel or brass rail. This is slightly cheaper than nickel silver and over many thousands of sets, probably represents more of a saving for the manufacturer than for the buyer. However, if you intend to construct a permanent model railway, it is STRONGLY suggested that you avoid the temptation to save a few dollars on using steel or brass railed track. Nickel-silver is the only way to go. And here's why.
All metals have an oxide form on them when in contact with the atmosphere. The oxide that forms on nickel silver happens to be electrically conductive, whereas that which forms on steel and brass is not. What this means is that you will find that trains tend to run erratically on steel and brass rail after a while and you need to clean the rails frequently to overcome this. Using nickel-silver rails means you will have better running trains and less time spent cleaning rails.
The rail material is easy to differentiate. Steel is a silver colour (or
rusty if not looked after properly). You can also use a magnet to
find out if it is
steel. Brass of course has its own distinctive colour/s. Nickel silver is silver
coloured, but has a slight gold tint to it.
![]()
Track cleaning. This is one of those subjects which brings much debate from modellers as to the 'best' method to use. So I shall begin with the methods NOT to use (in red) followed by some of the popular methods that are generally accepted.
|
Steel wool is a definite NO-NO. Among its many problems, the most important one is that the fragments of steel thread that get left behind will invariably be drawn into the gears and motors of your locomotives as the motors contain magnets. Needless to say, small pieces of steel in the mechanism will cause damage to delicate gears and quite likely will cause electrical short circuits too. | |
|
Sandpaper or Emerypaper. Although these will quickly restore a nice shine to the surface of your rails, they do more harm than good. Quite apart from the fact that they will wear down the rail over time, they will also leave scratches in the rail heads, which will soon fill up with more 'gunk' and in no time, your trains will be running poorly again. In the case of steel rails, you will remove the protective coating on the rails and promote rust. | |
|
Rail Cleaner blocks or rubbers. These are very popular and generally do a good job with few, if any problems. These are abrasive rubbers that look similar to an ink eraser. They are much gentler on rails than abrasive paper and those designed for model railway track generally do not shed much rubber. Peco make a popular rail cleaning rubber which is about the size of a medium-size pencil eraser. Larger blocks are available too such as that made by Fleischmann. | |
|
Track cleaning wagons. Some manufacturers offer special wagons that clean the rails as they are hauled along by a locomotive. This may be by a mildly abrasive pad on the rails, or by a felt pad soaked in a cleaning fluid. Some more advanced models may have motorised spinning pads or even a mini vaccuum cleaner. | |
|
Other methods can be a cloth soaked in methylated spirit or even a small block of Masonite. There are really too many methods modellers have come up with over the years to explain them all. Personally, I rarely find a need to clean rails very often. But others find they need to do this chore frequently. The amount of dust in the area you operate your railway will play a part in the frequency with which you need to clean the rails as well as other factors such as atmospheric conditions and materials used in constructing your railway. |
![]()
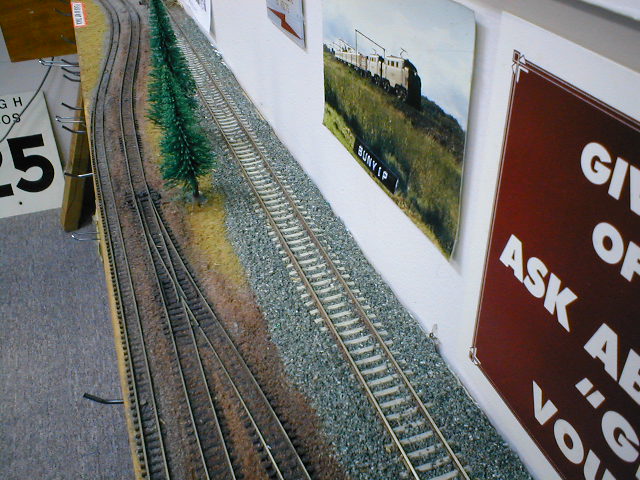
Roadbed or standard track. Yet another
choice is whether to use standard track or the newer varieties that include a
base which simulates the ballast under the track. The advantages of the roadbed
track is a more realistic appearance without the mess involved in adding loose
ballast and then having to glue it. Of course it is also more expensive. The
roadbed track appears in a number of train sets - especially USA ones. The main
reason for the appearance of this kind of track is that it is somewhat more
stable on temporary layouts and also better if you should decide to set it up on
the floor. If standard track is put on the floor, especially on carpet, then no
matter how clean you think it is, trust me, grit, hairs, fluff, cotton and
things you never knew were on the floor will get inside and ruin the mechanism.
In some ways, roadbed track is something of a gimmick, but it can certainly be
used to good effect on permanent layouts. The main drawbacks are the fact that
the various makes are not compatible with each other and also that you are
limited by the modular set track nature of the pieces. Oh, and the
aforementioned extra cost.
Flexible track with roadbed like that pictured above is not available from most
manufacturers . However,
some European brands such as Fleischmann make something similar, although the track
sits at "ground level' like standard track. The ballast is incorporated between
the sleepers rather than under it.
Roco is an exception. They have a flexible track with the full roadbed under the
track to raise it above baseboard level.
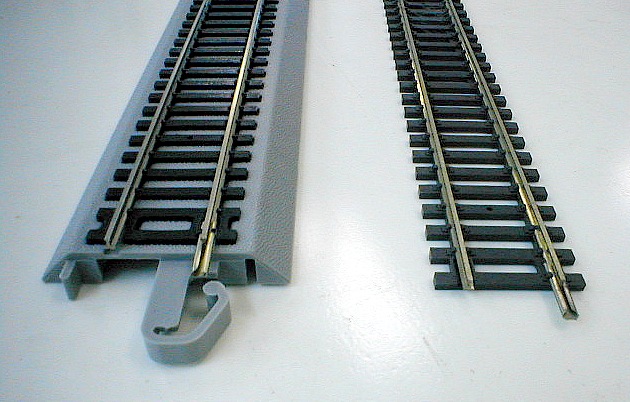
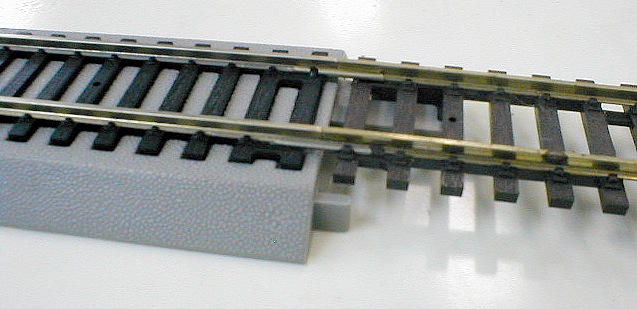
Some brands of roadbed track can still be joined
with standard track (pictured below) but you will need to make a ramp to adjust
the height for the standard tracks.
The tracks illustrated below are Bachmann E-Z Track on the left and Peco Setrack
on the right.
![]()
What's all this "code" business? Model railway track comes in different
rail heights. In HO or OO scale, the most common track is called Code 100. This
refers to the rail height of 100 thousandths of an inch.
Other common sizes are code 83 and code 75, which are 83 thou and 75 thou high,
respectively.
The reason for this is that although code 100 is popular and robust, it is
somewhat overscale for most situations. For modellers seeking greater realism
and improved appearance, the smaller-size rail is available. You can also mix
the codes and there are special joiners made for this purpose. For example,
using code 100 for mainlines and the lighter code 75 on sidings or branchlines.
As with the full size railways, different weight rails are used according to the
kinds of traffic on each line. Generally heavier and faster trains need heavier
rail. On a model the rail sizes are purely for appearance though.
Note that if you have older models from Tri-ang or Lima, you may not be able to
use track other than code 100 due to the deep flanges on these models. The
flanges are the part of the wheel that keeps them on the track. Older models
have deep flanges that may hit the sleepers on finer track. In fact, some very
early Tri-ang models will not even run reliably on code 100 rail either as early
Tri-ang track had even higher rails.
In N scale, code 80 is the common size with code 55 being a popular alternative.
![]()
The Baseboard.
Ideally you should have your trains running on a permanent board or base rather
than loose on a table. The floor is far from ideal as fluff, dirt and hairs can
easily work their way into the mechanisms on model trains (you'd sometimes
wonder how it does this, but I've removed many metres of hair from model
locomotives brought in for repairs over the years. So believe me, it does). Also the risk of damage from
being trodden on is very real. Some kinds of track are have a base under them to
represent ballast (Roadbed track, discussed above). If you must set up
track on the floor for any reason, then these types of track are better for floor use.
Standard track has gaps
between the sleepers - which allow the hair and fluff through to the models.
Temporary set-ups on a table or floor also tend to suffer from damaged or loose
joiners from constant joining and pulling apart, not to mention being bent by
tracks moving or being knocked. This leads to derailments and further damage to the
trains themselves.
What you construct your board from is a matter of
personal preference. Chipboard or particle board is a common material as it is
relatively cheap and doesn't require lots of framing. But it can be rather heavy
too. Many people choose to build a layout on the ubiquitous 8' x 4' sheet of
chipboard as it is a convenient size to build a HO or OO scale model railway.
But keep in mind that if it is against a wall, you may have trouble reaching a
stalled or derailed train if it is at the back of the layout. This size also
tends to dominate the average size room.
You may wish to consider building a shelf 400mm or so
wide around 2, 3 or even 4 walls of a room. It is a bit more work initially, but
you will usually end up with more running length. As well as this, the layout
will appear to take less space in the room and leave useable area for other things. Also, the space above and below the layout is still
available for more shelves and storage if you wish. You can either have a wider
section to turn trains around or lift-out / hinged sections across the door to
the room.
While particle board is popular, plywood is also very popular. And lighter. It does need more framing however. Also think about the scenery you intend to build. Do you really need all that flat table surface if most of it gets covered by scenery? And what about scenery below track level? By cutting the table-top either side of the trackbed, you leave open framework for more realistic scenery. Also you save weight if you need to move the layout. There are other materials useful for making a base for your model railway. Construction style extruded polystyrene foam (the blue or pink insulation kinds - not the expanded white packaging stuff) has been shown by many to work well. It is strong and lightweight. You may not even need any timber at all with this method.
For more ideas, call in and see our range of books on building a model railway.
![]()
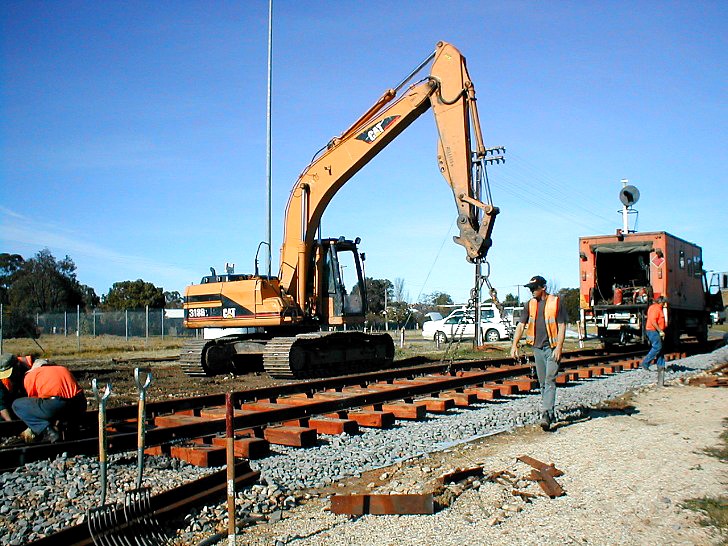
Laying track. Fortunately, you won't need any of the expensive gear these guys are using. Track can be nailed or screwed to the baseboard. It can also be glued down, but best not to do this until you know it is in the right place and you have run trains on it to know it shall work. The important thing to remember when laying track is that the surface should be smooth. A small lump on the chipboard may look harmless, but if the track is curved, it only has to lift the inside rail slightly higher than the outer rail to cause derailments to occur. Also be wary of rails sitting on rail joiners rather than in them. Run your finger along the joints. If you can feel them catch your finger, then they will likely derail a train too. When nailing the track down, try not to drive the nail all the way in. This makes it easy to remove later if you decide to move the track and if you add ballast to your track later, you can pull the nails out as the ballast glue will hold the track in place later. Also, driving the nails in too far can distort the plastic sleepers and cause the the rails to move inward at the top. This may result in derailments as the wheel flanges ride up on the rail.
![]()
![]()
![]()
![]()
![]()
![]()
![]()
![]()
Page updated 16/10/2012.